Showing posts with label D2. Show all posts

Sunday, 4 July 2010

Product comparisons to my images

Here are some images that I have found to advertise the products that I have included in my submission.


This is my image created outdoors to give a different view on standard presentation of golf shirts.


These are two images taken from a retailers site for the sale of Nike shirts, the left one being a ladies shirt, the right image being for a boys shirt. Both are valid images, and in a way I have adapted these two images to create my own.

This is an image  taken to illustrate this particular make of golf glove, and I have adapted to a version of this to make my own image.


This is an image advertising the RAM golf glove, plain and simple, with not alot of artistic merit.


This is my version of the Ram glove, which shows alot more detail to the glove, although this an older style of glove and of a different type.

This is also my image showing the packaging and associating the product further with golf with the inclusion of the ball.With a combination of them both the product is well displayed.


Here is the image for the climbers "nuts" to advertise the product. These are the more up to date specifiaction, colour coded for ease of reference, than the items I have used for my image. These have been imaged on a plain background.


This is my version of the climbing "Nuts", ( an older version), but I have included the shadow to emphasis the shapes of the various "nuts". I think yhis is a mors interesting version to that shown above, as it shows some artistic merit which draws your eye, and is just as simple to image.


Irving Penn still Life's
Shown below are some still life images created by Irving Penn. I feel they are somewhat dated but the principle is there. I particularly like the corks on the bottle and the lighting. The others have subtle shadows which enhance the products shape, as in the cheese image. The Vogue cover is a really great advertising feature, but it does have alot in the image to look at, as well as advertising the magazine.


This is a particular favorite of mine. If I was imaging this kind of subject this is the type of lighting I would use. I do like the way that a fellow student, Ruth, has imaged and lit here ceramics etc.

Product influences for final 10 images

The Flute image for Andrea's flute


This is a small selection of images taken from the Pearl website. This is how they advertise their products (in part) but are on their main front page.

This is part of one advert showing one of the different types of flute they have available in different styles.


This is on the opening stream


As is this one


This is not on the web site but shows a different way to shoot the product, although the background does not relate to music.


This is also not on the web site, but is another different way to show the product (see my golf shirts eg).I had considered stringing the flute up and photographing it before I saw this advert.


This is my final chosen image from my shoot which I set up on my dining room table, which is loosely based on the above with my interpretation, and there is still room for some advertising text on the image. Also there is a contact sheet which shows the alterative images I was considering. I chose the image due to the shape and coloring and lighting and the overall look of the image.


This then is my chosen final image


I have used similar techniques to produce the other images in this submission. For example I have included below the contact sheet for Graig's portrait and plastering equipment.


Here is my contact sheet for Craig


And here is my contact sheet Niki


The equipment used for these images was my own, with the lighting units borrowed from college, and using my dining room for all images. I tethered my camera to my laptop so that it was easier to see the results of the image once taken, and also, when photographing subjects the subject was able to see quite clearly the image that was taken, which made it easier to follow my instructions as he had the previous image in his mind to respond to. I have found that this is a good way to enable a better rapport between myself and the subject. I also use a wireless trigger wich makes it even easier to communicate with the subject, rather than trying to talk through the camera. This also makes it easier to move around, and even release the shutter closer to the subject when required to give directions in some cases, or hold reflectors as required, as you can see the image from the subjects position. Also used in this situation was the light meter, which has proved to be a boon and makes setting the camera alot easier.
Health and Safety wise, certainly when at home, you have to be very aware that the trailing cables are well away from the working area, not all plugged into the same socket, after taking note of the electrical requirements from the lights, camera, laptop etc. Also warning others in the house about what you are doing and placing certain access points out of use. Also some subjects will need a braek due to the intensity of the lighting, and this would also give the lighting chance to cool down.

Sunday, 27 June 2010

Lhottie at Calke Sunday afternoon


Once again Jim envigelled me into being his glamorous assistant, this time with Lhotte, so really did not miss the footy (well the Germans turned up anyway), much more fun out at Calke in the sunshine. Lighting was difficult, despite it being sunny (much cloud at times), but lovely and warm. Reflectors and flash just about made it. Just got the reflectors right and the sun went behind the clouds. It should be easy outside! Never the less Lhotte was very good, and very patient. Below are some of my images taken when the BOSS did not want me to hold his reflector.
Jims idea was for some Editorial shots using the light under the trees. I just enjoyed the opportunity to experiment with the light. No plan except Calke is a very good place with so many places to photgraph. I learnt a lot today, but time of day could be better, so next time will either be earlier or later in the day..
As Lhotte only had small sandles on we had to make sure that she was walking in an area without the thistles, and when she was not wearing shoes then to make sure she did not tread in anything she should not have been, especially as the cattle had been on the field.
When the sun was out the Gold reflector gave too much light(reflected under the trees on the model), the silver was also too much at times, but did good fill light to the face. The white reflector did not really register, although if placed close to the model it would have not been in the position to reflect the ambient light. Also had to be careful not to blind Lhotte.


This image was taken in the open with a cloudy sky.
Love this, taken in full sunshine and with a straight conversion. This is in line with my theme in the studio. I was pleased to get this effect outdoors as well.
Cheeky smile with my hat on, can't remember what I said now.
Somehow my hat got into this.

Just bursting into the sunshine. Fabulous dress, swayed in the breeze. I cant remember which pattern it is from the giraffe, not that Lhotte is anywhere near like a giraffe.

Mind the prickles on the grass, so many thistles, nice spot Jim!!
Peeking from behind the tree.
Lets pose now for Jim

Sunday, 23 May 2010

experimental things 2

I had some climbing equipment lent to me as I wanted to photograph it, and I set out into my garden once again, also with some borrowed lenses. Many thanks Ruth. My idea was to create an image of the various pieces of climbing equipment in the form of a man. it would have been difficult to string everything up, so I got my ladder out, about my height and started to assemble my work of art. I had initially tried it out on the ground using the ladder to get over the top but this did not look right, hence "ladder man". Of course, the ladder was too dominant, as was the background, and even with a 50mm 1.8 lens the background was still too much in focus. So, out came the ladder, and I was pleased with the result, but not the background. I then decided to do the individual parts and I really like the results, especially of the harness. In using my garden I had to be aware of other people wanting to use it (so told them not to) and lighting the area, I did not have an extension lead long enough, so no artificial lighting, and I was aware of the dampening conditions due to darkness coming on. I had to be careful with the fishing line as I did not want to cut my fingers, nor damage the tree I was tying it too, nor the goods on show, and also the pulling force one the "arms" as the weight tended to want to pull the supports (lighting stands) over. Although it took a while to create, it took less time to make rather than create in photoshop ( which only to minutes to adjust the final image anyway)
Overall I was pleased with the the outcome, and the product shots I like, as I managed to blur the background as I could get closer to them, rather than being further back for the larger image of the "ladder man". In some ways it has inspired me to name this "hanging by a thread", as climbers rely faithfully on this equipment.

Friday, 16 April 2010

Steve Chong

 Steve Chong - Conceptual and Still Life Photographer. born 1965-started Photography 2001
His photography started by taking images of his home town for his homepage on a point and shoot camera. He decided that they were not good enough. Thus began his interest in photography. He read all he could and after reading the series by Ansell Adams, this is where his smouldering passion for photography took off.
He bought an entry level Canon EOS/88 but soon upgraded to a EOS/1V and lenses. A year later, after much experimentation, he found a comfortable niche in Conceptual and Surrealistic photography. He enjoyed creating an idea and seeing it materialise. he states that "it is like pointing a camera into the real world, but shooting form his sub consciousness".
After realising that scanning images was taking too much time, he boughta digital Sigma SD9 and lenses. He also liked the quality produced by the medium format camera, so went out and bought a Mamiya RZ Pro II with a fish eye lens, a 90mm and 250mm lens.
He ahs gone on from these early beginnings to photograph a wide variety of images and subjects, from landscapes to portraits, documentary to Urban, along with his conceptual and surrealistic images.
he now gives talks and demonstrations around the world, and alos has Exhibited his work widely. In June 2009he obtained a distinction in the Visual Art Category with the ARPS. he ha scome a long way in a very short time, and his Blog contains a large variety of subjects.
His motto is" it is not what you see, it is how you see it", which I think is a good way of describing photography.


This is an example of his conceptual and surreal imagery. This is entitled "Illusion", and is a very clever play on light and is quite surreal. the lighting is quite spectacular to illustrate the desert like feeling to this image.


This is a good example of how to make a good image from an everyday product, with simple natural lighting and composition.The leaf shows the use and the shadow clearly adds to the composition.  Steve Chong says -"As I was strolling this morning, the rake leaning on the wall really caught my attention. I find it mesmerizing when I saw the shadow of the rake created by the golden morning ray of sun. The leaf stuck on the rake was a bonus. So I ran back home, got out my gear and took this shot."
This shows excellent lighting to illustrate a product in use.The lighting on the bubbles shows the many rainbow colours you get from the source of the bubbles. It seems that there are two light sources in action here, one plain on the girl, he other highlighting the bubbles.


The combination of colours here are classic, but the use of them to produce this image, from original item to final item in one image is an excellent interpretation. The direction of the lighting enhances the overall feel for this image.
Such a simple abstract pattern with composition being the main part of this image. It also conveys the anticipation of what is to come.
I am not sure what this is but I can see that it is abstract, and the shape of the liquid almost seems to form a golf club. The texture of the liquid is well represented as it evidently does not flow like water but is a more thicker liquid which forms this shape. The container also looks surreal as it appears to have no edges.
A very good play on subject matter. The lighting is quite dramatic across the image, and picks out the elements very well. The view point is at a level to which we can see all the action.
Another simple composition, with a combination of lighting. the candle lighting the interior, and the external directional lighting emphasising the shape of the product. This is very pleasing on the eye, very relaxing.
This is similar to the golf image above, but the lighting is even more dramatic.
This is entitled "Anticipation". The lighting again is quite clever to get an even spread over the image so that all is very well lit.

This is entitled "me and my shadow" and is a very simple composition and the objects sits very nicely in the top corner. The colour chosen is very easy on the eye and with an even shiny surface gives that wonderful shadow. With the one directional lighting this enhances the product shape and size.Light source was derived from my computer monitor. Steve Chong says -"I wrote a simple BASIC program to obtain the colors I desired. Interestingly, the surface of the table is pink. I bought the cup during my tour to Vietnam."

This image of the apples is called going higher,and the lighting is very subtle, and is coming from 2 directions. I like to subtle colours, the soft background is a good foil for the red cherries. Steve Chong says -"Everything in this shot was planned deliberately. The folds on the background and foreground demand the highest attention. In order to get the "right" folds at the respective places, I have to stroke, rub, re-adjust and not to mention blowing air on them. The objective is to create the sort of drama at the foreground and background, particularly on the foreground where they were use to lead the vision the subjects. The fabric at the foreground was silk and normal cotton for the background. To create the sepia look I have chosen a warm filter. The flare and reflections on the apples are eliminated by the use of a polarizing filter. It has also enhanced the colors on the apples." Steve says the light was Natural from a window.
The details for this image are :-Camera: Canon EOS/1V


Lens: Tamron SP90mm

Film: ASA100

Aperture: F3.5

Shutter: 1s

Filter: Polarizing Filter, Kenko 85

Light: Natural Light from window


Just to illustrate that this photographer does not only do conceptual and still life images, this is an image from his Yuan Yang series. The capture of the light here is just remarkable, even more so the lighting on the countryside is very exhilarating.

Monday, 12 April 2010

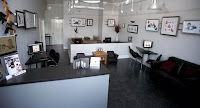
Paulo Lorenso Studios, Newcastle under Lyme

PAOLO LORASO STUDIOS
On Saturday Layla said she had a studio session and tutorial on Sunday, and asked me if I would like to go along to learn more about shoots etc. Needless to say no problem for me, hungry for knowledge and expertise.


And what fun and how interesting. So many tips and being made aware of what to look for. Most of it is only common sense, but you can get lost in taking the image as I discovered on Saturday. They are also the official photographers for the Signal 1&2 camera club.
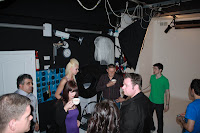
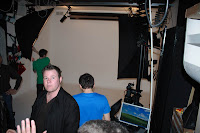
The studio is a professional studio, and is set up to be very commercial. There were 6 photographers in the session, all working and Paolo introduced us to how he runs his business and where he makes his money. He showed us round his studio, the various lighting set ups he has, why he uses certain products etc for example a make of lights. The studio photographers showed us how to use the models in the studio with the various lighting effects, all operated by remote control, for instant changes.
The studio is permanently set up, and is adaptable for many forms of Photography, from single portraits to group shots. He also explained the various revenue streams that he uses to make his business.
We each of us then were given 5 minutes with each of the 2 models (Layla being one, dressed and made up totally different to Saturday, and Christy the other) with 2 different lighting set ups, but this got a bit higglely piggly, but we got there.
It was really useful and very eye opening to see a studio being run. Very relaxed but professional.
It was an experience that I did not think I would have and I am very grateful to Layla for the Invitation.
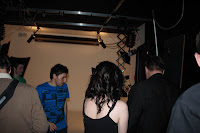
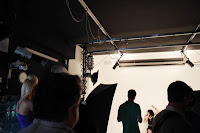
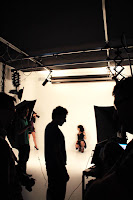
You can see some of the images here that I took.
Things I learnt are:-
Inkjet printers don't like dust so use in dust free environment
White ink is free(major cost for studio is the cost of ink-price per ml-generally allow twice the cost of paper for ink)
Models usually have a CD not prints because of this-only print when necessary-then usually 10x8.
Keep each area of the studio separate.
Use the best lighting equipment you can buy as this will last longer and work quicker.
Remote control of lighting leads to quicker changes, and turn round for different subjects, makes setting up the lighting really quick.
Using area lighting makes taking of images a lot easier where required.
Calibrate the camera to PC and printer(Spider Pro eg).
If cropping to 10x8 ensure your subject is in the correct frame when taking image.
Talk to the model not the camera
Don't stand on tip toe to take image.
Be very clear with your instructions to the model, talk face to face not through the camera.
When using projected backdrops be aware of any lines forming on the subject.
Check each picture you take, to ensure it is correctly exposed/in frame/composition is correct/enables feedback to the subject/ and you get what you are looking for.
This also allows you to rest your arms and prevents your hands shaking.
Always use a make-up artist, even for outdoors work.
Use of lighting to emphasize any aspects, or vica versa.

I used the studio 1D to take the shots, mainly as I had not used one before, and it was tethered to the PC. The set up was on 2 monitors, one for the photographer and one for the subject to see, but the results where after the shot taken.
The host Paolo was exceedingly knowledgeable and very hospitable and generous with his knowledge and answered any question put to him, with great amusement at times.
Here are some studio shots.